DreamArtistとは
Stable-Diffusionに対して1枚だけの画像の追加学習で 高品質の画像を生成する手法。
学習にはNovelAIを使用して生成した以下の画像を使用する。

環境
- OS : Windows11
- GPU : RTX3080Ti
インストール
1.Anacondaにpython3.10用の環境を作成する。
conda create -n py310 python=3.10.6
conda activate py310
2.「DreamArtist-stable-diffusion」をダウンロード。 github.com
git clone https://github.com/7eu7d7/DreamArtist-stable-diffusion
cd Dreambooth-Stable-Diffusion
3.学習済みモデルをダウンロード。 huggingface.co 上記リンクから「v1-5-pruned-emaonly.ckpt」をダウンロードし、 名前を「model.ckp」に変更して「models」>「Stable-diffusion」フォルダに配置する。
4.下記のコマンドで起動。
webui-user.bat
「Running on local URL: http://127.0.0.1:7860」が表示されたら http://127.0.0.1:7860にアクセス。
学習
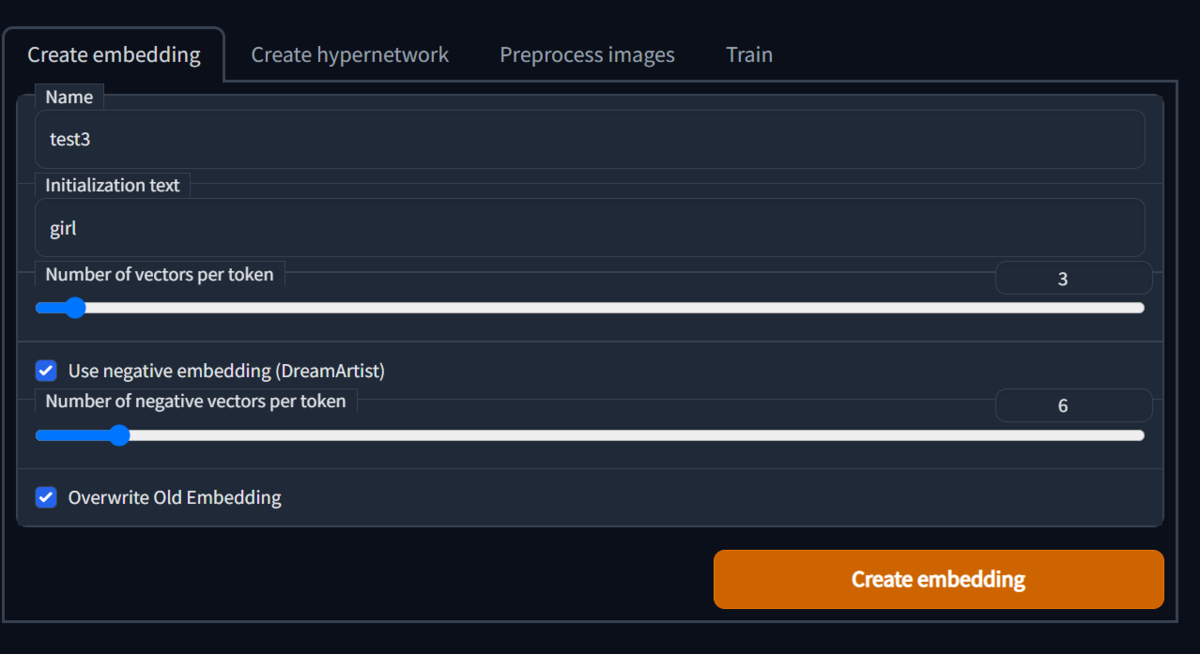
1.「Train」>「Create Embedding」ダブを開き、
以下の設定で「Create Embedding」。
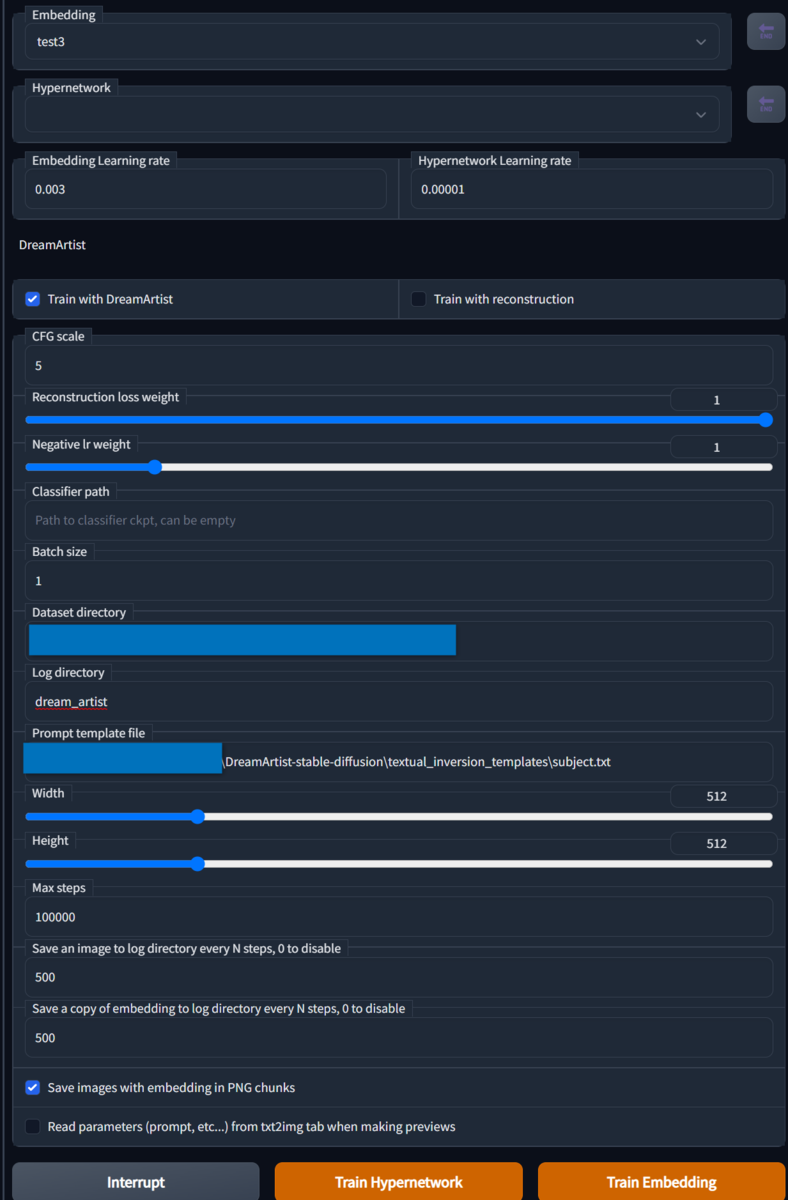
2.「Train」ダブを開き、
以下の設定で「Dataset directory」に学習する画像が入っているディレクトリを指定し、
「Train Embedding」で学習開始。
※VRAMが足りなかったので「Train with reconstruction」は外した。
結果
2万ステップまで学習し、 各プロンプトで生成した結果以下のようになった。
test3
| 1 | 2 | 3 | 4 |
|---|---|---|---|
 |
 |
 |
 |
test3,test-neg
| 1 | 2 | 3 | 4 |
|---|---|---|---|
 |
 |
 |
 |
どちらもあまりうまくいっていないが、 どちらかといえばネガティブプロンプトを使用してない方が良い結果に思える。